Sunday, February 26, 2012

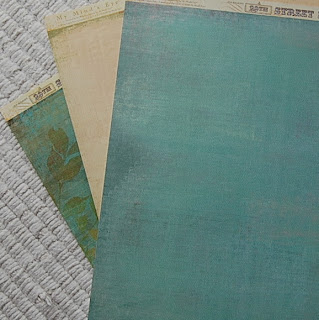
Scrap Book Paper Decor

Hello everyone!

My next project is the easiest and most inexpensive so far! I have been looking for artwork to fill the space on the walls next to my dining room table. But all the pieces I found (and loved) were at least $50 or more. So I decided to create something on my own, and set the budget for $40 total!

All you need:

1) 12" x 12" scrap book paper sheets: (ONLY 97 cents at Michaels)


2) Whatever size frames you need to fill your desired space. I wanted to put a small one in my bathroom so I got one matted 5" x 7" frame for that. For the spaces in my dining room, I got two
18" x 18" frames, matted to 12" x 12" (the exact size of the scrap book paper sheets). The 18" x 18" frames were at Michaels for $16 each.


Simply frame your scrap book pieces and you're done! 

This idea gives you a unique decor piece at an extremely affordable price. I had a get together at my house the other night and one of my friends asked me, "how much did you pay for those?" Thinking I was going to say I paid something absurd, I happily responded to him, "I made both of them on a $40 budget!" 

One wall in the dining room


For the bathroom


Saturday, February 4, 2012

DIY: Yarn Wrapped Bottles


I saw these on Pinterest and thought they would be a great addition to the mantle in my living room! I will walk you through the process of creating these adorable little decor pieces!

Items you will need to get started:

1) Beer, wine, scotch...whatever kind of empty bottles you have laying around the house. If you don't have any, here is a good excuse to have drinks with friends! I used a beer bottle, wine bottle, and scotch bottle that had a cool shape to it.

2) Elmer's glue

3) Yarn or jute, or whatever you find at your nearest craft store. 


Alright, let's get started...

Start by soaking your bottles in the sink so the labels are easier to peel off.


Next, begin adding a ring of glue around the bottom of your first bottle and use your fingers to stick the yarn to the bottle. I recommend gluing and wrapping around 3-4 times to secure. 


Now you can simply wrap the yarn up the body of the bottle, tightening and bunching every so often so there are no spaces where the bottle can be seen through the yarn. 

Once you get to the curve of the bottle, you will need to start gluing again so the yarn does not slip on the curve. 


Once you reach the top of your bottle, glue the end down. The glue should still be slightly wet at this point, giving you the freedom to fix problem areas or fill in spaces.


I chose to mix it up, using two different colors and patterns. But the options are endless, Michaels has a huge selection of yarn and other materials for this project. These are very easy to do and make a great little accent piece!