Thursday, April 5, 2012

Trend Alert: Wrap Bracelets and Watches

Good morning everyone!

Today I will be accessorizing my look with this amazing studded wrap watch!

Bali Stud Wrap Watch

Wrap watches and bracelets are very popular right now, showing up on the wrists of celebrities including, Kate Hudson, Lady Gaga, Halle Berry and more...

Mix and matching colors and textures of wrap bracelets or watches can add a little pop to a plain outfit. Another great thing about this trend; is can carry on through any season. Having a versatile wardrobe and accessory stash is the key to keeping up with the trends, you simply add on to what you already have to fit the current trend! For wrap bracelets and watches, stick with darker colors for Fall and Winter and liven it up for Spring and Summer with pinks, yellows and white! You can add this accent to a day or night time outfit. 

Here are a few other combos I have created for myself:

Triple Wrap Leather Bracelet

Weave Watch
& Studded Wrap Leather Bracelet 
Turquoise Studded Leather Cuff
& Leather Wrap Bracelet

Studded Leather Wrap Bracelet
& Rhinestone Wrap Around Watch


Tuesday, March 27, 2012

Quick and Chic Look

Hello my lovely followers!

I put together a look this morning from a few items on my website, www.ellalane.com!

I started with the "Zig Zag Button up Top," which is a lightweight chiffon top that has a slightly longer back, giving it a more unique twist. The buttons are red to give the top a little pop as well. Pair this with skinny jeans for a chic look. You can easily mix this outfit with flats or heels depending on how dressy you want to make it. Accessories include the "Stacy Satchel," a bag that can comes with an additional cross body strap if you want to dress the outfit down a bit for daytime. Tear drop earrings and a leather wrap bracelet tie the whole look together.

The great thing about this look is the ability to dress it up OR down. Need to make a quick transfer from day to night? Put some heels on and remove the cross body strap to dress up the bag. You could also put your hair in a high bun to show off the gorgeous earrings and give the outfit a chic look. 

Sunday, February 26, 2012

Scrap Book Paper Decor

Hello everyone!

My next project is the easiest and most inexpensive so far! I have been looking for artwork to fill the space on the walls next to my dining room table. But all the pieces I found (and loved) were at least $50 or more. So I decided to create something on my own, and set the budget for $40 total!

All you need:

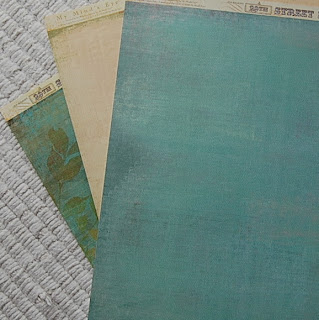
1) 12" x 12" scrap book paper sheets: (ONLY 97 cents at Michaels)


2) Whatever size frames you need to fill your desired space. I wanted to put a small one in my bathroom so I got one matted 5" x 7" frame for that. For the spaces in my dining room, I got two
18" x 18" frames, matted to 12" x 12" (the exact size of the scrap book paper sheets). The 18" x 18" frames were at Michaels for $16 each.


Simply frame your scrap book pieces and you're done! 

This idea gives you a unique decor piece at an extremely affordable price. I had a get together at my house the other night and one of my friends asked me, "how much did you pay for those?" Thinking I was going to say I paid something absurd, I happily responded to him, "I made both of them on a $40 budget!" 

One wall in the dining room


For the bathroom


Saturday, February 4, 2012

DIY: Yarn Wrapped Bottles


I saw these on Pinterest and thought they would be a great addition to the mantle in my living room! I will walk you through the process of creating these adorable little decor pieces!

Items you will need to get started:

1) Beer, wine, scotch...whatever kind of empty bottles you have laying around the house. If you don't have any, here is a good excuse to have drinks with friends! I used a beer bottle, wine bottle, and scotch bottle that had a cool shape to it.

2) Elmer's glue

3) Yarn or jute, or whatever you find at your nearest craft store. 


Alright, let's get started...

Start by soaking your bottles in the sink so the labels are easier to peel off.


Next, begin adding a ring of glue around the bottom of your first bottle and use your fingers to stick the yarn to the bottle. I recommend gluing and wrapping around 3-4 times to secure. 


Now you can simply wrap the yarn up the body of the bottle, tightening and bunching every so often so there are no spaces where the bottle can be seen through the yarn. 

Once you get to the curve of the bottle, you will need to start gluing again so the yarn does not slip on the curve. 


Once you reach the top of your bottle, glue the end down. The glue should still be slightly wet at this point, giving you the freedom to fix problem areas or fill in spaces.


I chose to mix it up, using two different colors and patterns. But the options are endless, Michaels has a huge selection of yarn and other materials for this project. These are very easy to do and make a great little accent piece!


Friday, January 27, 2012

DIY: Wall Decor

At this point in my life I am all about the DIY home decor projects. I don't have the money to run to Target and spend $200 on stuff for my walls. 

I am always looking for ways to fill the empty space on my walls for an affordable price, which brings me to my latest DIY project for my bedroom: Three fabric covered canvases to go over my bed. 


What you will need (everything will be at Michaels if you have one close by):

1) Your canvases, I recommend going with increments of three (three with larger canvases and six for smaller ones). Take a trip to Michaels and see which canvas size you like best. I am using 18" x 24".

2) Light duty staple gun:


3) Light duty staples:


4) Your fabric: I went with a gray and white chevron fabric to match my gray duvet, but the options are endless! Set aside 1 1/2 to spend in Joann Fabrics, you will be in there for awhile! 


Before you buy your fabric, decide on how many canvases you want to cover, so you can measure accordingly. I recommend getting extra (1/2 yard or so) just incase you mess up. 

Start by laying out your canvas on the fabric to get ready to cut. Make sure there is enough room on all four sides so you can staple to the back of the canvas (I usually eye ball about an inch and a half). 


Start by folding the fabric over and stapling the long sides of the canvas, this way you can pull the fabric so that it's tight over the canvas. Then move to the shorter sides, making sure you pull those tight also. If you are using a pattern fabric, flip over occasionally while you are stapling to make sure the pattern is straight. 


Use two nails to hang each canvas evenly and you're done! You have an inexpensive and adorable wall decor piece! 

My three canvases above my bed!